Flaky Pie Crust Recipe
- Ambaruchii

- Sep 17, 2021
- 5 min read
Updated: Jan 5, 2022
This Flaky Pie crust Recipe, is my Easy Go to Pie crust Recipe that's sturdy for any filling and simply delicious! The trick to a flaky Pie crust is COLD🥶...cold butter, cold water, and refrigerating it for a few hours before rolling it out. This is because the cold pieces of butter throughout the dough will interact with the heat in the oven, and form air pockets which cause the crust to rise and give it that flakiness.


Another trick for a flaky and (not soggy) pie crust, is to blind bake the crust. Blind Baking the crust is a fancy way of saying pre baking the crust. Pre baking the crust for a few minutes before adding the filling, always ensures that the bottom of the crust is not raw or soggy. If you were to add filling to a pie crust without pre baking the crust first, you will most definitely have raw dough in the bottom of the pie, because the filling is blocking the crust from baking evenly. So pre baking the crust is a very important step for all pies!
When pre baking a pie, people usually add a parchment sheet in the center of the crust with dry beans or rice on top as weights, this is to prevent the crust from rising too much in the center. Personally I haven't done this yet and my pies have always turned out fine. What I do, is poke several holes evenly with a fork to create air pockets for the air to escape, and prevent the crust from rising too much in the center. Then I pre bake the crust for at least 10 minutes. If I notice any lumps, I simply grab a spoon or small measuring cup, and press down on the crust to smooth out any lumps while the crust is still warm.

NOTE: This is a double layer pie crust recipe for a 9 inch pie plate.
Ingredients:
-2 cups All purpose Flour
-1 tablespoon granulated Sugar
-1/2 teaspoon Salt
-1-1/2 sticks or (3/4 cups) of diced cold Butter
-1/4 cup plus 2 teaspoons of cold Water
Directions:
In a bowl add the flour, sugar, salt and mix well.

Then add the diced COLD butter. Remember the butter must be cold to get that flaky crust. I like using butter sticks because they're easier to measure (1 stick =1/2 cup) and also they are easier to cut into small cubes as needed for this recipe. *For this recipe you will need 1-1/2 sticks of diced cold butter which is equivalent to 3/4 cups.
NOTE: I do want to note that mixing the butter in with the flour in a food processor would be so much easier.

You can also use a dough cutter for this and it would break down the butter and be easier to mix with the flour. But I chose the hard way...
I started with a fork, mushing the butter to help break it down and mixing it with the flour. I like to feel the butter mixing with the flour in my hands, because if I have large chunks anywhere then I can break them down with my fingers. Basically what I do is just rub or sprinkle the butter and flour together with my fingers until it breaks down into small pieces. You want small little crumb pieces of flour coated butter all throughout. You also need to work fast, since the heat in your hands will change the butters temperature and you want it to stay cold.


Like I said, using a food processor would be so much easier. This is the food processor I usually use. FOOD PROCESSOR:
Once the butter and flour form little crumbs all over, you want to add 1/4 cup of very cold water. Mix the dough around with your hands, you'll notice it comes together but is still a bit dry and crumbly. Turn the dough out on your counter, add 2 more teaspoons of cold water, and mix the dough together until it forms into a dough ball and holds it's shape. *It should not be crumbly anymore.


You don't want to overwork the dough because then you will have a tough, hard pie crust. As soon as it comes together, form the crust into a disk, wrap it in plastic wrap, and refrigerate it for at least 1 hour. Since this is a double layer pie crust recipe, I formed mine into 2 separate disks, one for the bottom crust and one for the the lattice top.


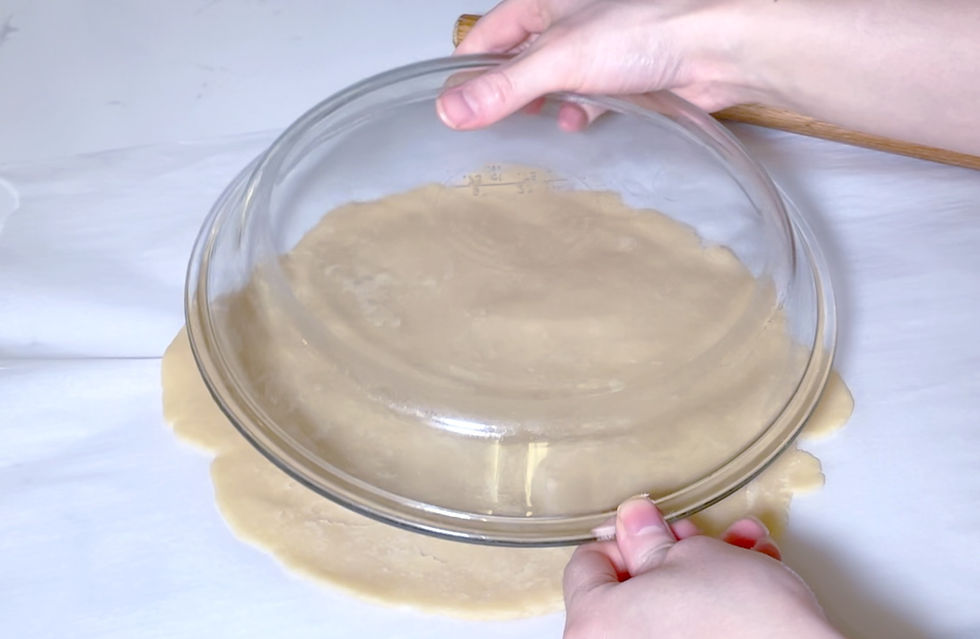
After the dough has been in the fridge chilling for at least 1 hour, you can remove it from the plastic wrap, and soften it slightly by kneading it around with your hands. Remember don't over work the dough. Roll the dough out on your counter, I used a sheet of parchment paper to roll mines out on, but you can just flour your surface to prevent it from sticking. I rolled the dough out as big as the top part of my pie pan which is a 9 inch pie pan.
* If using a deep dish pie pan, you may want to double this recipe because this is enough dough for just a standard 2 layer pie pan.


Once I rolled out the crust to the size I need, I grab the dough and add it onto the pie pan.
*I did not spray or coat my pie pan before adding the crust, this is not necessary for this recipe.

Then adjust the crust with your fingers forming it properly onto the pan. Once the crust is placed onto the pan how you'd like, it's time to start poking holes with a fork on the bottom of the pie crust.
As I stated earlier you can blind bake the crust using weights, however that's not something I've had to do with this recipe. Poking holes onto the bottom of the pie crust, helps release the trapped heat in the dough as it bakes and prevents the dough from rising too much, it also helps the crust bake evenly.


I pre bake my crust at 350 degrees for at least 10 minutes. You can pre bake it for anywhere from 10-15 minutes, or if you're using a filling that doesn't require baking (like a mousse or ice box pie) then you can bake it completely, let it cool and add the filling.
When baking a fruit pie such as apple, cherry, or even a pumpkin pie, it's best to pre bake the pie crust as I stated earlier. Adding the filling onto a raw dough will definitely prevent the dough from cooking properly in the oven, and will leave you with a soggy undercooked crust. Pre baking will ensure you have an evenly cooked and flaky crust on the bottom.
This is my pie crust after I baked it for 10 minutes, it's not fully cooked, but it's not raw either. It will continue cooking after I add the fruit filling and lattice top.
*Be sure to let the pie crust cool for at least 15 minutes before adding any fillings.

For this pie, I decided to make a Caramel Apple Pie, The recipe will be available soon!
I added the Caramel Apple filling into the pre baked pie crust after it has cooled.

Then I rolled out the other disk of pie dough, and cut strips to make a thick lattice crust for the top.

To be honest, I still don't know How To make a Lattice Pie top without having to google step by step pictures😆

After I successfully added the lattice top, I gave the top crust an egg wash and sprinkled over the egg wash with a bit of sugar. *The egg wash helps give the crust a beautiful golden color as it bakes.
FYI: I know I used the worlds tiniest brush for the egg wash. It was the only food safe brush I had.


After I gave the crust an egg wash and sprinkled some sugar on top, I popped the pie in the oven.
This is the end result, a golden, flaky, delicious, crust!


Perfect crust recipe it came out great
Looks yummy and everything so detailed 😊